buntu 16.04 LTS Desktopに「Ethereum」をインストールします。CUIとして「geth」、GUIとして「Ethereum Wallet」をインストールします。
記事の目次
使用した環境
- Ubuntu 16.04 LTS Desktop : 16.04.5
- Geth : v1.8.15-stable-89451f7c/linux-amd64/go1.10
- Ethereum Wallet : 0.11.1
gethのインストール
リポジトリから、EthereumのCUIであるgeth(Go Ethererum)をインストールします。
リポジトリからgethをインストール
リポジトリから、EthereumのCUIであるgethをインストールします。
$ sudo add-apt-repository -y ppa:ethereum/ethereum
$ sudo apt-get update
$ sudo apt-get install ethereum
インストール状況の確認として、gethのバージョンを表示させます。
$ geth version
Geth
Version: 1.8.15-stable
Git Commit: 89451f7c382ad2185987ee369f16416f89c28a7d
Architecture: amd64
Protocol Versions: [63 62]
Network Id: 1
Go Version: go1.10
Operating System: linux
GOPATH=
GOROOT=/usr/lib/go-1.10
gethの初期設定
gethの初期設定として、ethereumの初期のアカウントを作成します。最後の、Address行に、Ethereumのアカウントのアドレスが表示されます。
$ geth account new
INFO [09-04|00:35:52.835] Maximum peer count                       ETH=25 LES=0 total=25
Your new account is locked with a password. Please give a password. Do not forget this password.
Passphrase:
Repeat passphrase:
Address: {ef42067c7a0f1b1ccb271ebe67cf7e7b686c8762}
gethの起動と取引情報の同期
gethを起動します。取引情報(ブロックチェーン)は、デフォルトで「~/.ethereum」に保管されます。
$ geth
取引情報の同期が始まるので、終了を待ちます。同期状態は以下のコマンドで確認できます。
$ geth attach
Welcome to the Geth JavaScript console!

instance: Geth/v1.8.15-stable-89451f7c/linux-amd64/go1.10
coinbase: 0xef42067c7a0f1b1ccb271ebe67cf7e7b686c8762
at block: 0 (Thu, 01 Jan 1970 09:00:00 JST)
 datadir: /home/sysadm001/.ethereum
 modules: admin:1.0 debug:1.0 eth:1.0 ethash:1.0 miner:1.0 net:1.0 personal:1.0 rpc:1.0 txpool:1.0 web3:1.0

> eth.syncing
{
  currentBlock: 86314,
  highestBlock: 6247662,
  knownStates: 157316,
  pulledStates: 148155,
  startingBlock: 0
}
初期アカウントが認識されていることも確認しましょう。
> eth.accounts
["0xef42067c7a0f1b1ccb271ebe67cf7e7b686c8762"]
currentBlockが、 highestBlockとほぼ同じになれば同期完了です。初回の同期にかかる時間は、マシンのスペックにより大きく変わり、数時間から数日かかります。
gethの停止
以下のコマンドで、gethを停止します。
$ killall geth
Ethereum Walletのインストール
gethはコマンドラインのみで扱いにくので、GUIのEthereum Walletをインストールします。
Ethereum Walletのダウンロード
Ethereumのホームページで、Downloadボタンを押し、linux用のzip版(本稿作成時:Ethereum-Wallet-linux64-0-11-1.zip)をダウンロードし、解凍します。解凍先は任意ですが、以下「~/ethereumwallet」とします。
Ethereum Walletの起動
Ethereum Walletの起動前にgethを起動します。
$ geth
Ethereum Walletをデスクトップから直接起動しても良いのですが、起動状況がわかるのでコマンドラインからEthereum Walletを起動します。
$ ~/ethereumwallet/ethereumwallet
[2018-09-04T07:59:10.843] [INFO] Settings - Running in production mode: true
[2018-09-04T07:59:10.914] [INFO] EthereumNode - undefined null 'light'
[2018-09-04T07:59:10.916] [INFO] EthereumNode - Defaults loaded: geth main light
[2018-09-04T07:59:11.203] [INFO] main - Starting in Wallet mode
...
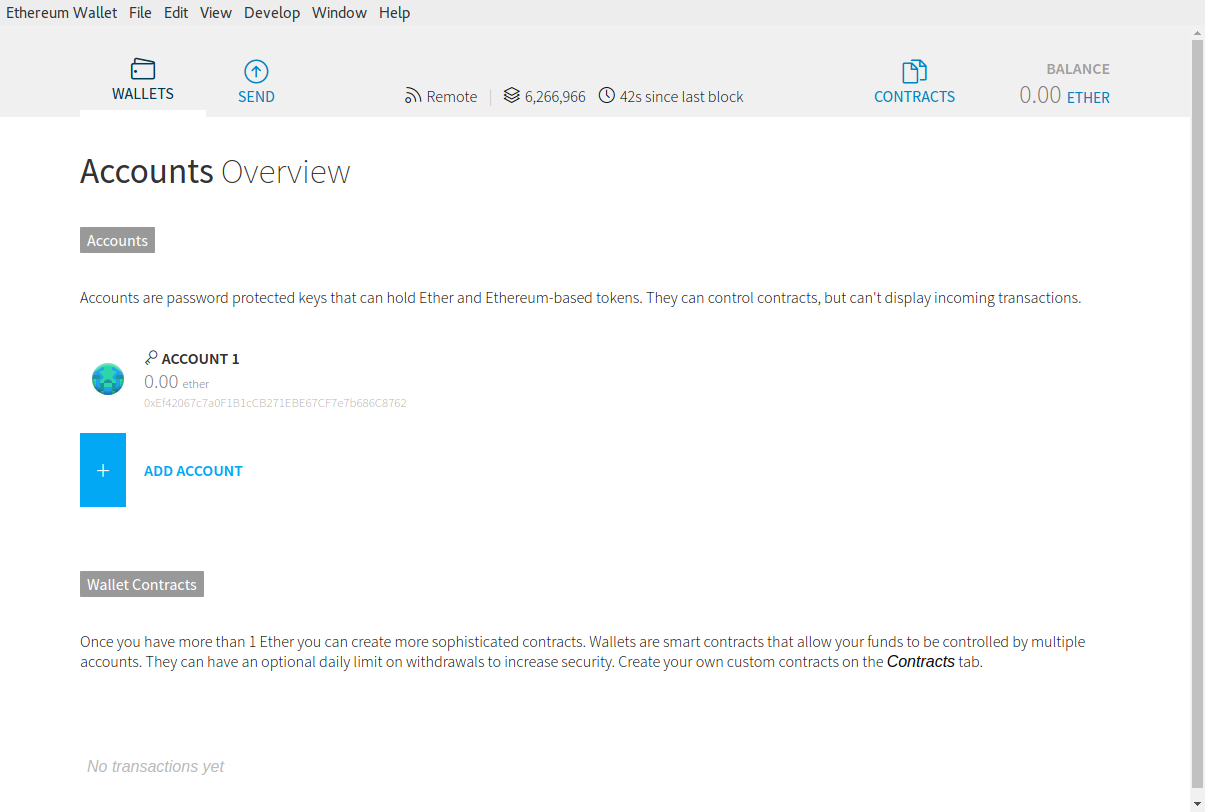
コマンドラインを確認すると、起動したgethと通信していることが確認できます。GUIの画面が起動すると、初期アカウントの存在が確認できます。

おわりに
ethereumのCUIは、リポジトリからインストールすることが可能です。GUIについては、別途Ethereumのホームページのリンクからダウンロードしてインストールします。
参考