Ubuntu Desktop 18.04でVagrantを使用する!

Ubuntu 18.04 LTS DesktopにVagrantをインストールして使用します。Vagrantをインストールすると、用意された構築済みの環境を容易に使用できるようになります。
記事の目次
使用環境
- Ubuntu 18.04.3
- Virtualbox 6.0
- Vagrant 2.2.6
VirtualBoxのインストール
VirtualBoxミイインストールの場合は、次の記事を参照して、VirtualBoxをインストールします。
Vagrantのインストール
Vagrantをインストールします。
Vagrantのダウンロード
VagrantのダウンロードページからDebian用のパッケージをダウンロードします。
Vagrantのインストール
Vagrantのパッケージをインストールします。
$ sudo dpkg -i ~/Downloads/vagrant_2.2.6_x86_64.deb
vagrantコマンドを実行して、インストールされたことを確認します。
$ vagrant version
Installed Version: 2.2.6
Latest Version: 2.2.6

You're running an up-to-date version of Vagrant!
VagrantのプロジェクトのセットアップとBoxの追加
Ubuntu 18.04 LTSのBoxを使用するため、Vagrantのプロジェクト用のディレクトリを作成し、「vagrant init」コマンドを使用して環境の初期化を行います。
$ mkdir vagrant_getting_started
$ cd vagrant_getting_started
$ vagrant init hashicorp/bionic64
A `Vagrantfile` has been placed in this directory. You are now
ready to `vagrant up` your first virtual environment! Please read
the comments in the Vagrantfile as well as documentation on
`vagrantup.com` for more information on using Vagrant.
Ubuntu 18.04 LTSのBoxイメージをを、「vagrant box add」コマンドを使用してVagrantに登録します。
$ vagrant box add hashicorp/bionic64
==> box: Loading metadata for box 'hashicorp/bionic64'
    box: URL: https://vagrantcloud.com/hashicorp/bionic64
This box can work with multiple providers! The providers that it
can work with are listed below. Please review the list and choose
the provider you will be working with.

1) hyperv
2) virtualbox
3) vmware_desktop

Enter your choice: 2
==> box: Adding box 'hashicorp/bionic64' (v1.0.282) for provider: virtualbox
    box: Downloading: https://vagrantcloud.com/hashicorp/boxes/bionic64/versions/1.0.282/providers/virtualbox.box
    box: Download redirected to host: vagrantcloud-files-production.s3.amazonaws.com
==> box: Successfully added box 'hashicorp/bionic64' (v1.0.282) for 'virtualbox'!
Vagrantファイルが作成されたことを確認します。「vagrant init」コマンドでは、boxの指定のみですが、使用するboxのバージョン、boxのURL、ネットワーク等を行うことができます。
$ ls
Vagrantfile
$ vi Vagrantfile
...
Vagrant.configure("2") do |config|
...
  config.vm.box = "hashicorp/bionic64"
...
end
VagrantのBoxから作成したマシンの起動/SSHログイン/シャットダウン/削除
VagrantのBoxより作成したマシンを起動します。
$ vagrant up
Bringing machine 'default' up with 'virtualbox' provider...
==> default: Importing base box 'hashicorp/bionic64'...
==> default: Matching MAC address for NAT networking...
==> default: Checking if box 'hashicorp/bionic64' version '1.0.282' is up to date...
==> default: Setting the name of the VM: vagrant_getting_started_default_1575380353790_6719
Vagrant is currently configured to create VirtualBox synced folders with
the `SharedFoldersEnableSymlinksCreate` option enabled. If the Vagrant
guest is not trusted, you may want to disable this option. For more
information on this option, please refer to the VirtualBox manual:

  https://www.virtualbox.org/manual/ch04.html#sharedfolders

This option can be disabled globally with an environment variable:

  VAGRANT_DISABLE_VBOXSYMLINKCREATE=1

or on a per folder basis within the Vagrantfile:

  config.vm.synced_folder '/host/path', '/guest/path', SharedFoldersEnableSymlinksCreate: false
==> default: Clearing any previously set network interfaces...
==> default: Preparing network interfaces based on configuration...
    default: Adapter 1: nat
==> default: Forwarding ports...
    default: 22 (guest) => 2222 (host) (adapter 1)
==> default: Booting VM...
==> default: Waiting for machine to boot. This may take a few minutes...
    default: SSH address: 127.0.0.1:2222
    default: SSH username: vagrant
    default: SSH auth method: private key
    default: Warning: Connection reset. Retrying...
    default: Warning: Remote connection disconnect. Retrying...
    default: Warning: Connection reset. Retrying...
    default: Warning: Remote connection disconnect. Retrying...
    default:
    default: Vagrant insecure key detected. Vagrant will automatically replace
    default: this with a newly generated keypair for better security.
    default:
    default: Inserting generated public key within guest...
    default: Removing insecure key from the guest if it's present...
    default: Key inserted! Disconnecting and reconnecting using new SSH key...
==> default: Machine booted and ready!
==> default: Checking for guest additions in VM...
==> default: Mounting shared folders...
    default: /vagrant => /home/sysadm001/vms/vagrant/vagrant_getting_started
Ubuntuに「vagrant ssh」コマンドでログインします。
$ vagrant ssh
Welcome to Ubuntu 18.04.3 LTS (GNU/Linux 4.15.0-58-generic x86_64)

 * Documentation:  https://help.ubuntu.com
 * Management:     https://landscape.canonical.com
 * Support:        https://ubuntu.com/advantage

  System information as of Tue Dec  3 13:42:23 UTC 2019

  System load:  0.13              Processes:           92
  Usage of /:   2.5% of 61.80GB   Users logged in:     0
  Memory usage: 11%               IP address for eth0: 10.0.2.15
  Swap usage:   0%

 * Overheard at KubeCon: "microk8s.status just blew my mind".

     https://microk8s.io/docs/commands#microk8s.status

0 packages can be updated.
0 updates are security updates.


$ pwd
/home/vagrant
vagrant@vagrant:~$ ls -l
total 0
vagrant@vagrant:~$ cat /etc/issue
Ubuntu 18.04.3 LTS \n \l

vagrant@vagrant:~$ df -h
Filesystem                    Size  Used Avail Use% Mounted on
udev                          463M     0  463M   0% /dev
tmpfs                          99M  4.8M   94M   5% /run
/dev/mapper/vagrant--vg-root   62G  1.6G   58G   3% /
tmpfs                         493M     0  493M   0% /dev/shm
tmpfs                         5.0M     0  5.0M   0% /run/lock
tmpfs                         493M     0  493M   0% /sys/fs/cgroup
vagrant                       916G   92G  825G  10% /vagrant
tmpfs                          99M     0   99M   0% /run/user/1000
vagrant@vagrant:~$ logout
Connection to 127.0.0.1 closed.
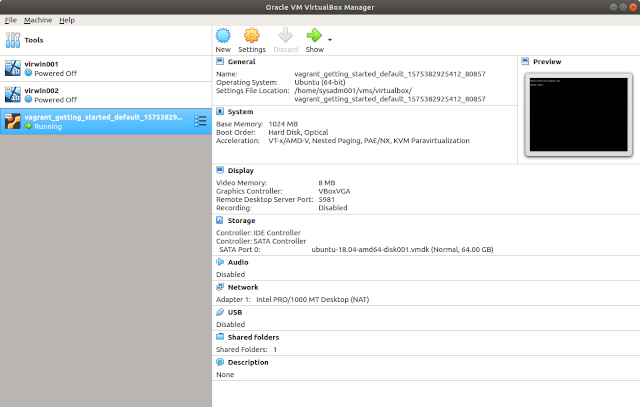
VirtalBoxからもマシンの状態を確認できます。
仮想マシンのシャットダウンは、「vagrant halt」コマンドで行います。(「vagrant suspend」コマンドでサスペンドも使用できます。)
$ vagrant halt
==> default: Attempting graceful shutdown of VM...
使用し終わったら、「vagrant destroy」コマンドで仮想マシン上のリソースを開放します。
$ vagrant destroy
    default: Are you sure you want to destroy the 'default' VM? [y/N] y
==> default: Forcing shutdown of VM...
==> default: Destroying VM and associated drives...
仮想マシンのBoxのファイルを完全に削除する場合は、「vagrant box remove」コマンドを使用します。
$ vagrant box remove hashicorp/bionic64
Removing box 'hashicorp/bionic64' (v1.0.282) with provider 'virtualbox'...
ネットワークの設定
ネットワークを設定する場合は、Vagrantfileで行います。以下は、固定IPを設定する例になります。
$ vi Vagrantfile
...
  config.vm.network "private_network", ip: "192.168.33.10"
...
Vagrantfileを変更したときは、「vagrant reload」コマンドで仮想マシンを再起動しましょう。
$ vagrant reload
==> default: Attempting graceful shutdown of VM...
==> default: Checking if box 'hashicorp/bionic64' version '1.0.282' is up to date...
==> default: Clearing any previously set forwarded ports...
==> default: Clearing any previously set network interfaces...
==> default: Preparing network interfaces based on configuration...
    default: Adapter 1: nat
    default: Adapter 2: hostonly
==> default: Forwarding ports...
    default: 22 (guest) => 2222 (host) (adapter 1)
==> default: Booting VM...
==> default: Waiting for machine to boot. This may take a few minutes...
    default: SSH address: 127.0.0.1:2222
    default: SSH username: vagrant
    default: SSH auth method: private key
    default: Warning: Connection reset. Retrying...
    default: Warning: Remote connection disconnect. Retrying...
==> default: Machine booted and ready!
==> default: Checking for guest additions in VM...
==> default: Configuring and enabling network interfaces...
==> default: Mounting shared folders...
    default: /vagrant => /home/sysadm001/vms/vagrant/vagrant_getting_started
==> default: Machine already provisioned. Run `vagrant provision` or use the `--provision`
==> default: flag to force provisioning. Provisioners marked to run always will still run.
ネットワークが有効になったかどうかは、pingコマンドで確認してみましょう。
$ ping 192.168.33.10
ファイル同期をが行われるフォルダ
Vagrantfileのあるフォルダは、仮想マシン上の「/vagrant」にマウントされています。このフォルダにおいては、ローカルのマシン上で作成したファイルを、仮想マシン上からアクセスすることができ、逆に仮想マシン上で作成したファイルをローカル上のマシンからアクセスすることもできます。
vagrant@vagrant:~$ ls -l /vagrant
total 4
-rw-r--r-- 1 vagrant vagrant 3082 Dec  4 13:16 Vagrantfile
VagrantのBoxの検索
以下のURLからBoxを検索して利用することができます。
おわりに
VagrantのホームページのGetting Startedに従って、Ubuntu 18.04 LTSを使用してみました。もちろん、Vagrant Cloudで使用可能なBoxを検索し、Vagrantfileを作成して、Ubuntu 18.04 LTS以外のBoxを多数使用することができます。
参考情報(Vagrant)
参考情報(Ubuntu)
関連記事


関連書籍(Amazon)
